How Do I Make A Wet Room
Ever dreamt of stepping out of your shower and right into a spa-like oasis? Or maybe you're just tired of splash-back all over your bathroom floor? If so, then the world of wet rooms is about to get very exciting for you! These innovative bathroom designs are not just a trend; they're a smart, stylish, and surprisingly achievable way to transform your everyday routine into something a little more luxurious and a lot more practical. Forget cramped shower cubicles and fiddly curtains – a wet room offers a breath of fresh air, literally and figuratively, in your home.
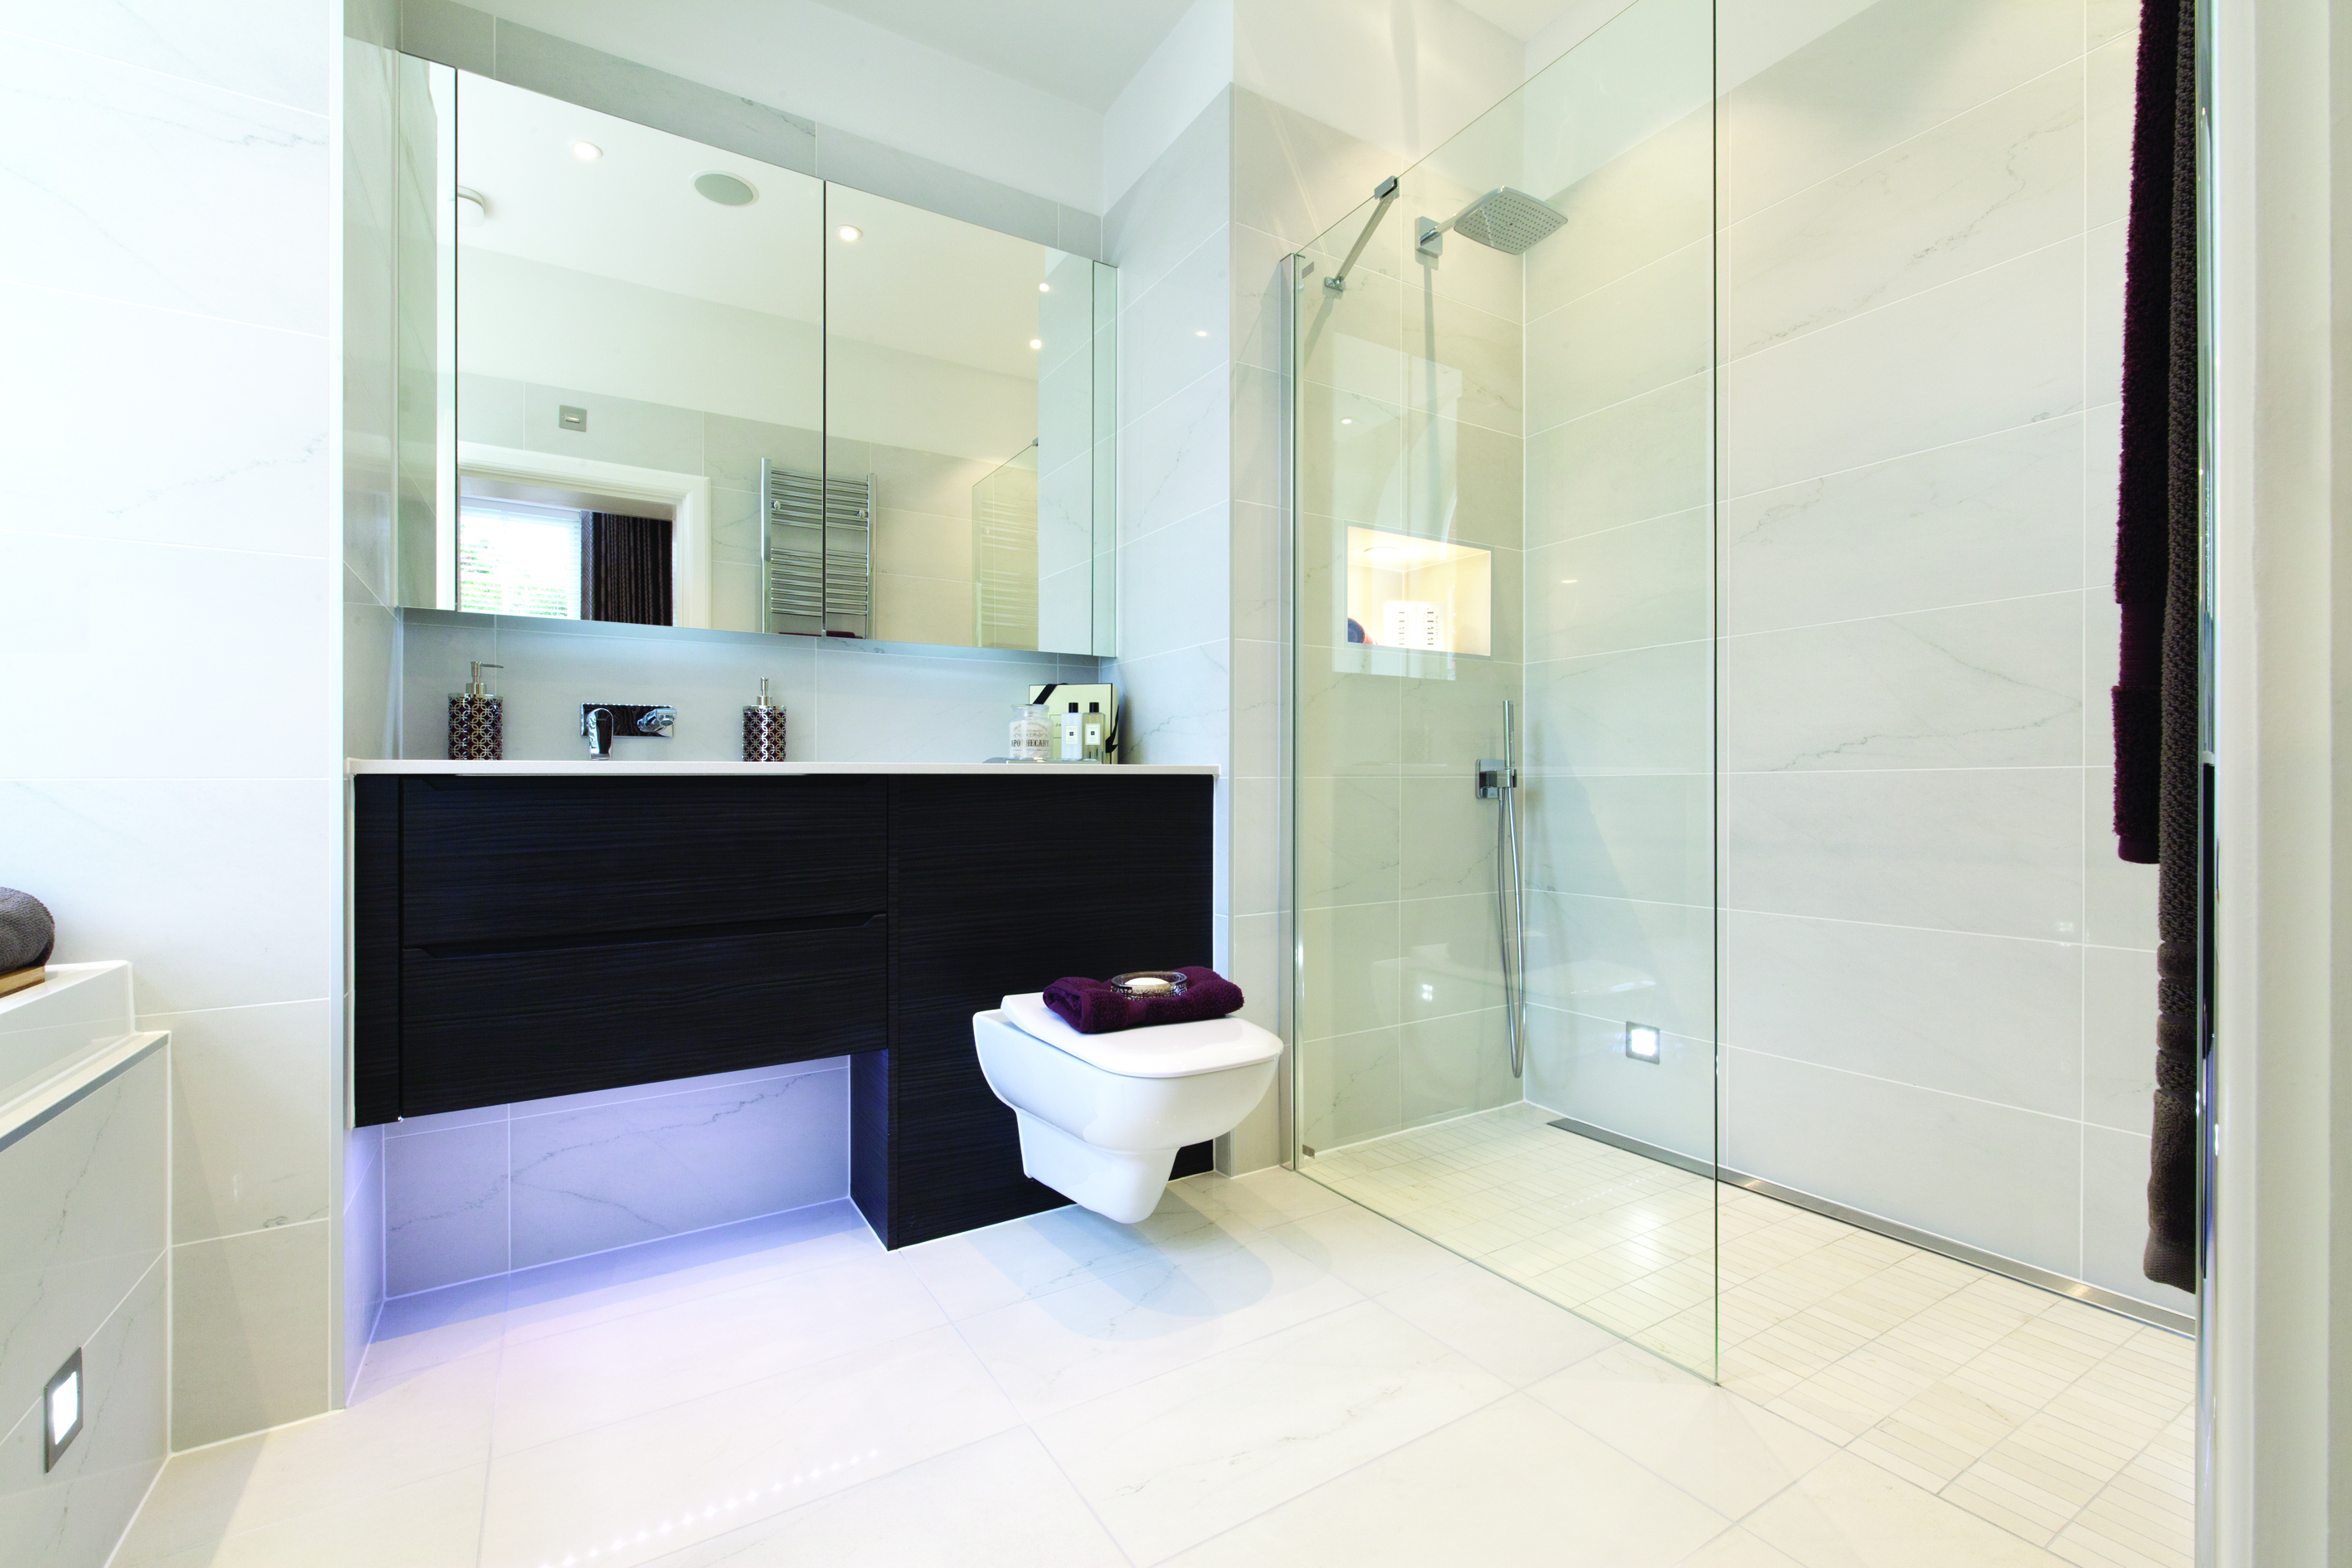
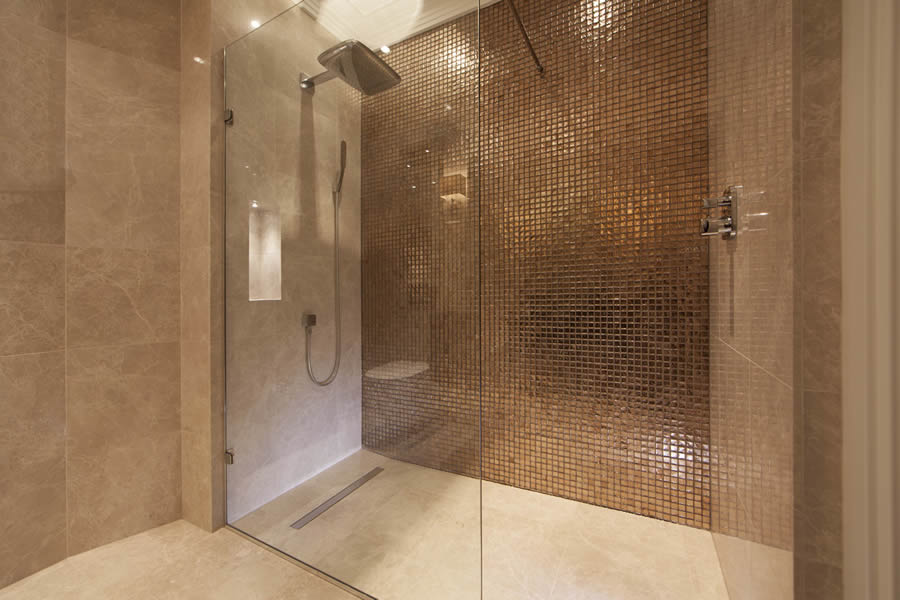
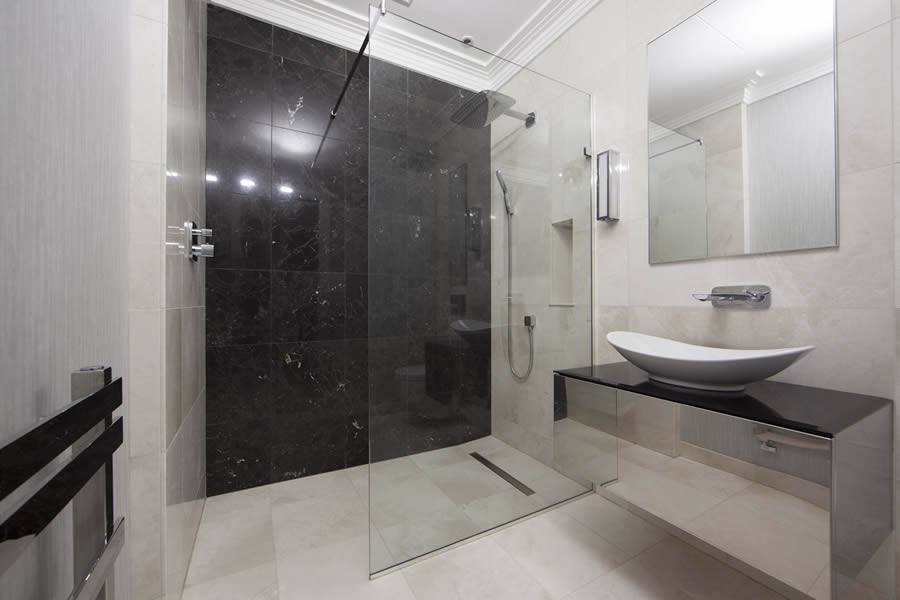
So, what exactly is a wet room? In simple terms, it's a bathroom, or a dedicated section of a bathroom, that is completely waterproofed. Think of it as a shower area that seamlessly blends into the rest of your room, with no separate enclosure. This means everything – from the showerhead to the floor, and even the walls – is designed to get wet. Sounds a bit daunting? Don't worry, it's all about clever design and specialized materials that ensure everything stays precisely where it should – and more importantly, that no water escapes to cause damage.
Why Go Wet? The Undeniable Perks
The appeal of a wet room is multifaceted, hitting all the right notes for homeowners seeking a blend of style, function, and accessibility. For starters, there's the space-saving magic. If you've got a smaller bathroom, a wet room can make it feel instantly bigger and more open. By eliminating a bulky shower tray or enclosure, you create a sense of flow and airiness that can transform even the most compact of spaces. It’s like performing a visual vanishing act on all the clutter!
Beyond aesthetics, wet rooms offer incredible practicality. Cleaning becomes a breeze. With fewer nooks and crannies for soap scum and limescale to hide, a quick squeegee and a wipe-down are all it takes to keep your wet room sparkling. Imagine spending less time scrubbing and more time enjoying your revitalized bathroom!
And then there's the matter of accessibility. This is a huge benefit, especially for households with elderly relatives, young children, or anyone with mobility issues. The absence of a step into a shower tray makes entering and exiting the shower incredibly easy and safe. It fosters independence and provides peace of mind for everyone in the family. It’s a design choice that’s as thoughtful as it is stylish.
But let's not forget the modern aesthetic. Wet rooms ooze sophistication. They lend themselves beautifully to minimalist designs, featuring sleek lines, contemporary tiles, and rainfall showerheads. They can elevate the look and feel of your entire home, making your bathroom a true sanctuary.
:max_bytes(150000):strip_icc()/318869030_178768811419001_7357673301553507914_n-e15fd0b874924f6db0ed28ee7145e619.jpg)
Making the Dream a Reality: The Essential Steps
Now, for the exciting part – how do you actually make a wet room? While it might seem like a daunting DIY project, with the right planning and materials, it's definitely achievable. The core principle is, as we've touched on, waterproofing. This isn't just about slapping on some sealant; it's about creating a robust, impermeable barrier.
Step 1: The Foundation – Drainage is Key!
This is arguably the most critical element. Your wet room needs a drainage system that can handle the water flow efficiently. Typically, this involves a recessed floor drain. These are designed to be installed flush with the floor, often with a stylish grate that complements your tiles. The floor itself will need to be sloped towards this drain, usually at a gradient of about 1-2cm per metre. This ensures water doesn't pool and instead flows away as it should. Proper slope is non-negotiable!

Step 2: Creating the Waterproof Shell – Membrane Magic!
Once your drainage is in place and the floor is sloped, it’s time to install a waterproofing membrane. This is a flexible, impermeable sheet that's applied to the floor and up the walls. Think of it as a protective suit for your bathroom structure. Brands like Schlüter-KERDI and Weber.tec Superflex offer excellent systems. This membrane creates a seamless barrier, preventing any moisture from seeping into your walls or subfloor. It’s usually applied with specialized adhesive and sealed at all joints and corners.
Step 3: Walls and Floor – The Finishing Touches
With your waterproof shell in place, you can now tile your floor and walls. Large format tiles are a popular choice for wet rooms as they mean fewer grout lines, which can be easier to maintain. Make sure you use water-resistant grout and adhesive. Many modern tiling systems are designed with wet rooms in mind, offering excellent adhesion and flexibility.
Step 4: Showering in Style – The Shower System
You'll need a showerhead that’s suitable for a wet room environment. Rainfall showerheads mounted from the ceiling or wall are a classic choice, offering a luxurious cascade of water. You might also opt for a handheld showerhead for added convenience. Remember to consider where your shower controls will be placed for ease of use and to minimize any potential water splash issues.
Step 5: The Extra Touches – Ventilation and Fixtures
Good ventilation is crucial to prevent steam and condensation build-up. An efficient extractor fan is a must-have. When it comes to fixtures like basins and toilets, you can choose anything you like, as long as they are installed correctly and any potential leak points are properly sealed.
"A well-designed wet room is a testament to smart, modern living. It combines beauty with unparalleled practicality."
Building a wet room is more than just a renovation; it’s an investment in your home’s functionality, accessibility, and aesthetic appeal. It’s a project that, when done right, will bring joy and ease to your daily life for years to come. So, are you ready to dive in and create your own personal slice of spa paradise?